MAP™ for MindManager
The innovative "Swiss Army Knife" that extends & enhances your application of Mindjet® MindManager® in business & personal projects.
Try it free today for 14 days. You'll wonder how you ever managed without.
Combine Sub-Topics
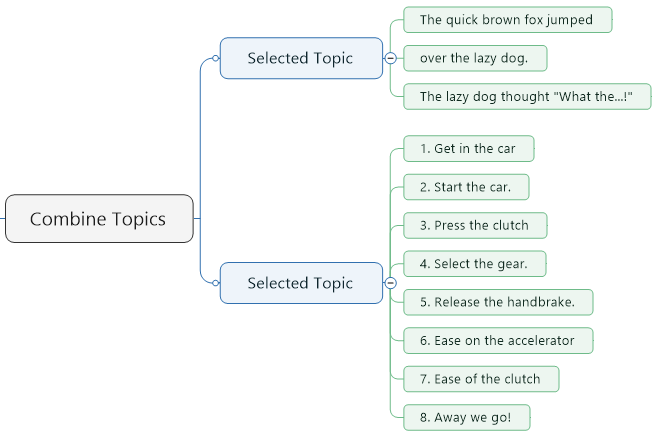
Combine Topics is a Topic Action that offers the ability to consolidate the Sub-Topics of a selected Parent Topic into itself. The Combine Topics command is located on the Topic Actions group.
This capability makes it easier to contract Maps that are become larger than you might wish and is also useful for stitching together text which gets placed into the Map in Sub-Topics rather than a complete paragraph as it the case when cutting and pasting text with some PDF’s.
When used on a Topic that contains multiple levels of Sub-Topics the remaining Sub-Topics will be moved up one level to connect to the selected Topic.
Before:
After:
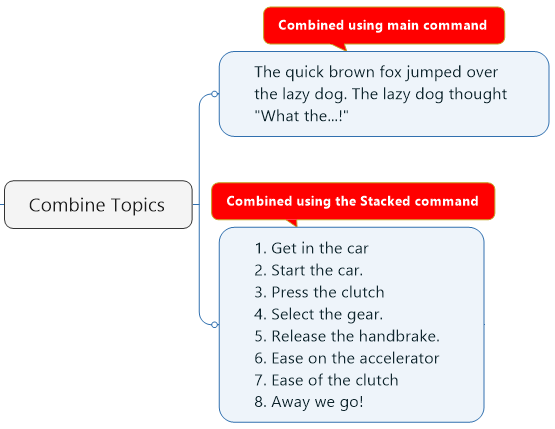
Combine Topics will NOT combine Images, Priority Markers, Progress Markers, Custom Properties, Spreadsheets, Autocalc or Relationships.
Topic Notes will also be combined but will only be in Plain Text. Any custom formatting such as Bold, Tables, Images etc will be lost.
Fixed Topic Width
Fixed Topic Width is a Topic Action command that lets you create Map Topics with a fixed width irrespective of Icons and Text on the Topic.
This command can be used to create Maps that have nice even Sub-Topics creating a more balanced appearance for those who like some order to their Map layout. The command is useful for Maps that will be created for sharing with viewers who are not familiar with the Map format as it creates a more structured and ordered appearance.
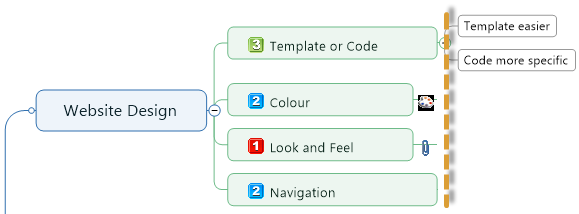
Note that the Topic Icons located on the outside of the Topic Shape are aligned, not the edge of the Topic Shape. This is so that the next level of Sub-Topics will always start aligned with each other.
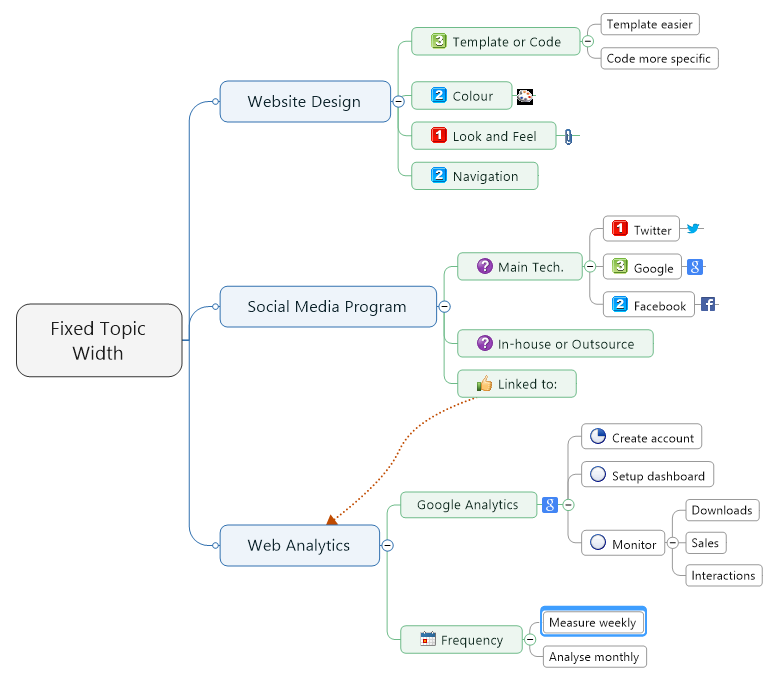
Complete Map Example – Below is a before and after of the sample Map showing the end result.
Sample Map before Fixed Topic Width is applied
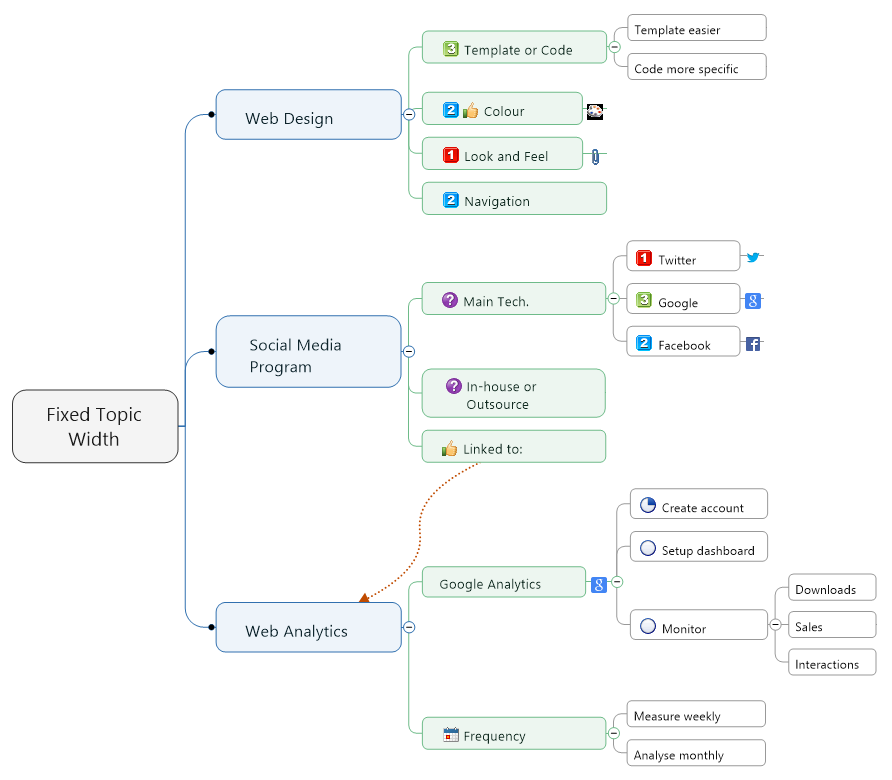
and the result after using Fixed Topic Width.
Images – Fixed Topic Width works by using a 1 pixel high transparent image and placing it onto the Topic to force the Topic width. This means that you will not be able to use this command on Topics that already have images as they will be replaced. If you wish to use Images on Topics you will need to manually adjust these topics using another method. Perhaps packing the Topic Text with spaces or by resizing the image to match the layout.
Relationships – Currently if a Topic contains a relationship when Fixed Topic Width is applied it will remove the Relationship. This means you will need to re-apply the relationship after using the command. We hope to make this automatic in a future release.
Lock Topic Text
Lock Topic Text is a Topic Action that lets you protect the Topic text on your Maps. When a Topic is locked using this command it will mean that if another person tries to change the Topic Text they will be notified that the text is read-only.
This command is useful when you have text content you want to make sure remains constant if the Map is re-distributed across users without any control from the originator. Text that is locked using this command can only be unlocked by the originator.
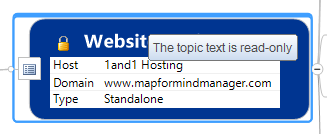
If an attempt to change the text is made by another Map user they will see the following message.
Lock Topic Text will only lock the Topic text. It will not lock any other Topic elements such as Images or Icons etc.
Move Task Start Date
In MindManager 15, Mindjet introduced the capability to change the Start Date of a Project. This function detected the earliest Task Start Date in a Map and then adjusted all Start Dates depending on the new date selected by the user.
While this is great for adjusting the timings of a whole Map, it does not enable you to move Task Start Dates for single Map Branch of from a specific selected Topic within a Map Branch. The Move Task Start Date function provided by MAP will now enable you to do this.
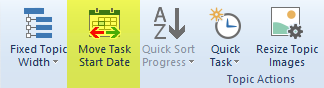
This new function sits in the Topic Actions ribbon menu and will be enabled when a Map Topic that contains a Start Date is selected.
Clicking the command will open a dialog containing a Date/Time Chooser. Selecting the new Start Date from this and clicking OK will then update the Map Topics.
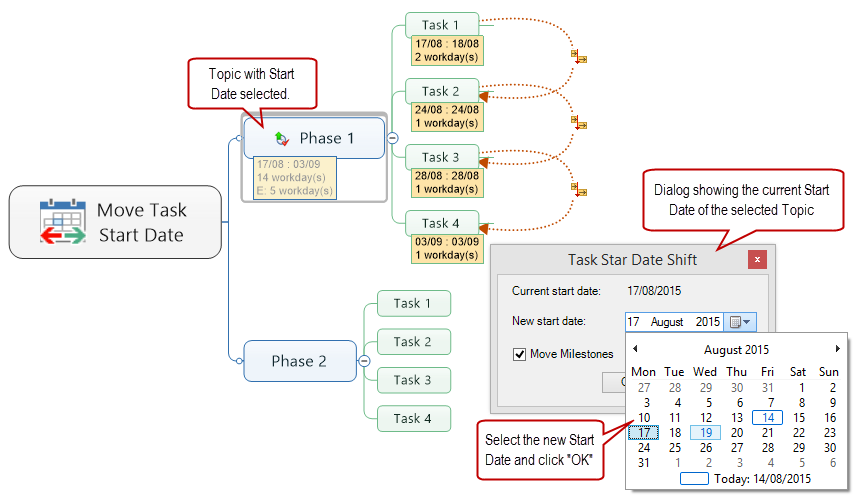
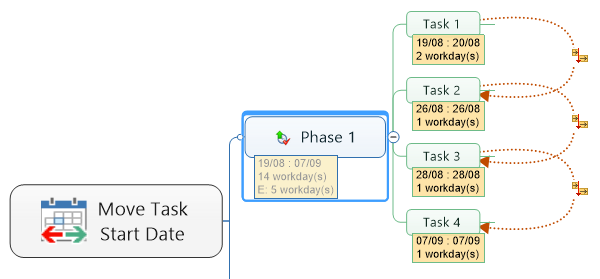
The selected Topic and its Descendant Topics will then update accordingly
This function can be useful when you need to change the dates on Maps you are using for schedules or date driven series of events such as course work etc. enabling you to quickly update your Map content to match the desired time scales.
The function can move Task Start Dates forward or back, updating the Task Start Dates in all Sub-Topics from beneath the selected Topic.
Note: You do not to have Dependencies set on the Topics for this function to operate.
 Quick Sort
The Quick Sort function will help you sort/index Sub-Topic trees by specific Topic attributes quickly and easily.
Sometimes it makes Map information easier to read/understand when Sub-Topic trees are sorted/indexed by a specific Topic attribute, for example a task Start Date or task Priority.
You can achieve this with MindManager’s Sort function accessed from the Edit Topics group located under the Advanced ribbon tab. Selecting the upper part of the Sort command will index the Sub-Topics in alpha-numeric order. You can sort on other attributes by clicking the lower part of the command and accessing the Sort Options. Here you can apply other sort criteria.
The drawback of this is that if you wish to sort the Sub-Topics on anything other than alpha-numeric Topic Text you have to click into the Sort Options each time.
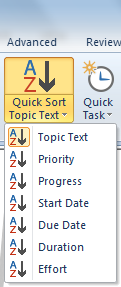
MAP for MindManger’s Quick Sort lets you sort Sub-Topics by Topic Text (alpha-numeric), Start Date, Due Date, Duration, Priority, Progress and Effort.
Quick Sort also stores the last sort type used which means it is immediately available to apply to another Topic selection from the main command. This allows you to quickly sort Sub-Topics to view the information in a different context.
Quick Task
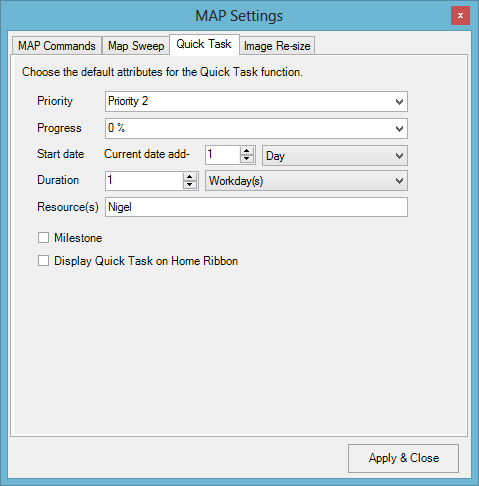
 Quick Task is a Topic Action that enables you to insert Map Topics pre-populated with default Task attributes. The Task attributes can be configured in the MAP Settings by the user to create the configuration of Task attributes that works best.
The Quick Task command can save you lots of time when creating Project Dashboard and Timeline Maps. You can quickly build up Topic frameworks for each section of your Project with just a few mouse clicks.
Quick Task can be added to the MindManager Home menu so it is always quickly available. This can be set in the options for the command.
Resize Topic Image
The Resize Topic Images command is a Topic Action that enables you to resize Topic images so they look consistent across your Map.
Sometimes you need to resize Topic Images to make sure they are appropriate for your style of Map, its contents and its audience.
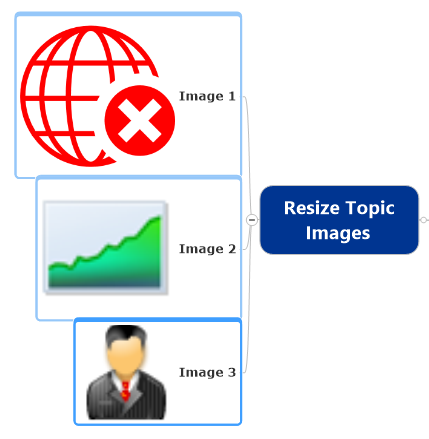
When using images from varying sources you may not always have the required size and therefore need to manually resize the image while it is on the Topic. Using the small grab handles in MindManager can sometime be frustrating and does not always allow you to get the same dimensions across all images for some reason. While this can get the desired results if you have a few images to do is can become time consuming and drive you nuts at the same time. The Resize Topic Images command saves you that hassle and trip to the Asylum.
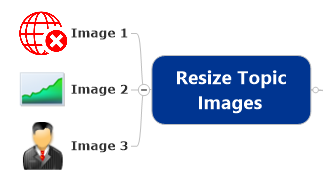
You can also lock the aspect ratio of either the height or width so that images resize while maintaining their aspect ratio.

If you wish to select all the Map Topics to run this command across the Map simply use CTRL + A and then select the Resize Topic Images command from the menu.
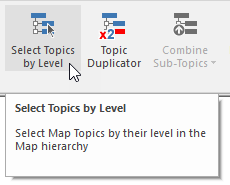
Select Topic(s) by Level
This MAP command will enabled you to select Topics across your Map based on their level within the Map hierarchy.
When initiated a dialog prompts you to set the level you wish to select from a drop-down list. This list will only include levels utilised in the current map.
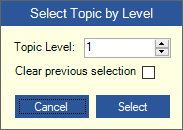
If you already have a selection in the Map you can clear this by checking the Clear previous selection checkbox.
Click the Select button to activate the selection and see the result.
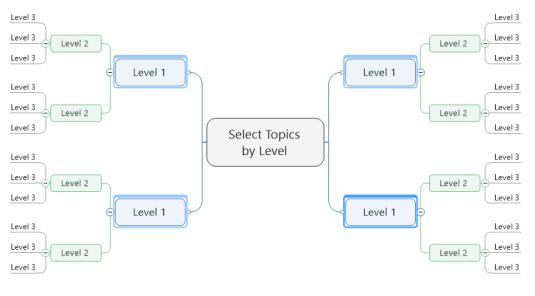
You can also “stack” selections making it possible to select multiples of Topics by level.

If you do wish to do this then make sure you leave the Clear previous selection checkbox unchecked.

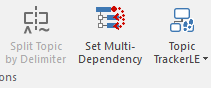
Set Multi-Dependency
When creating Dependencies between Map Topics for projects you have to set them one at a time. If you want to set up a “one to many” Dependency then this can be quite time consuming. Set Multi-Dependency speeds this operation up for you.
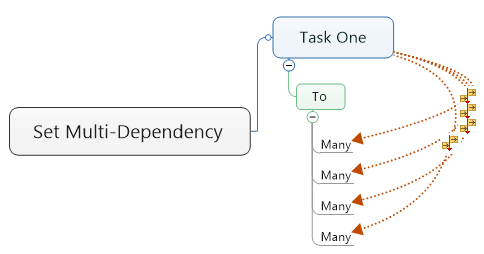
Located on the Topic Actions Group, this command opens a dialog that prompts for the Dependency type. The command is only active when you have more than one Topic selected and the Active Topic will always be the FIRST Topic that was selected.
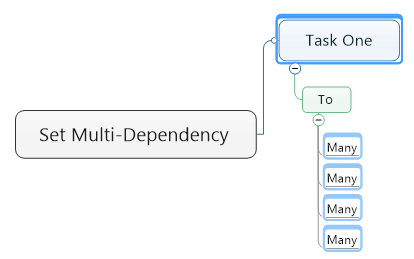
The Set Multi-Dependency dialog that prompts you to select the Dependency type.

The Same selected Topics after Set Multi-Dependency has been applied.
Split Topic by Delimiter
The Split Topic by Delimiter function provides the ability to split Topic Text into Topics/Sub-Topics based on the positioning of a pre-defined delimiter character. In this case, the “^” and the “~” characters.
The command button can be found on the MAP ribbon (if enabled) on the Topic Actions group or the MAP Task Pane.


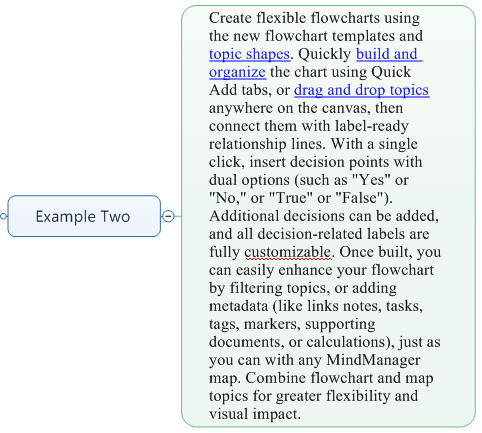
Example Topic before Mark Up

The image above shows a Topic with a fair amount of Topic Text that we can split.
Example Topic after Mark Up
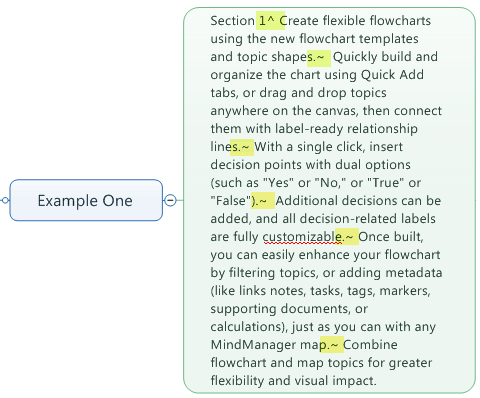
Note the Caret “^” character and Tilde “~” character placement.
Example Topic after Splitting Process
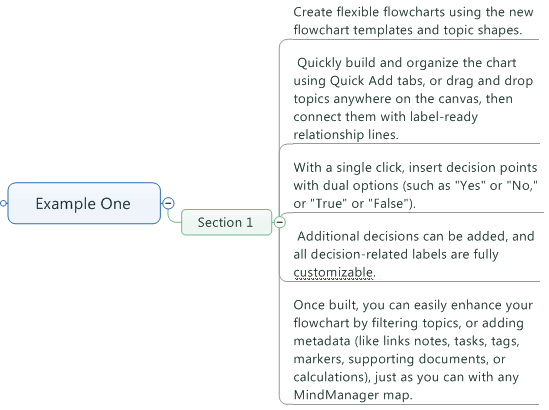
The image above shows the Topic re-structure after the Split Topic by Delimiter function has been run.
How this works
In order for the command to be enabled, the Topic you wish to split needs to contain at least one Caret character “^” and one Tilde character “~”.
A Caret character will split the Topic as a Main Topic or Topic that subsequent sections marked with a Tilde character “~” will be attached to.
Any text that has a Tilde “~” character after it will be treated as a Sub-Topic of the preceding Topic marked with a Caret character.
You can use multiple Caret characters to create new Topics to add Sub-Topics to as shown in the example below.
Example Topic before Mark Up
Note the above example Topic also contains formatted text (hyperlinks).
Example Topic after Mark Up
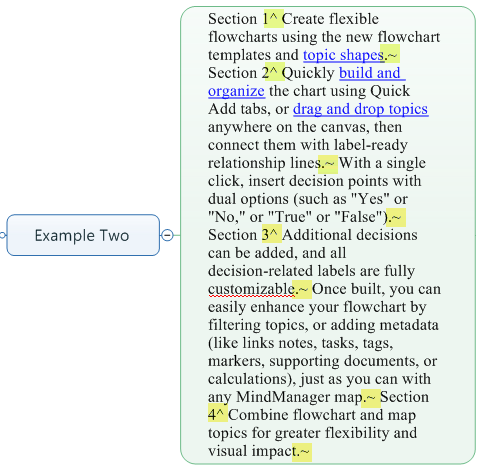
Note the multiple mark up of Carets and Tildes.
Example Topic after Splitting Process
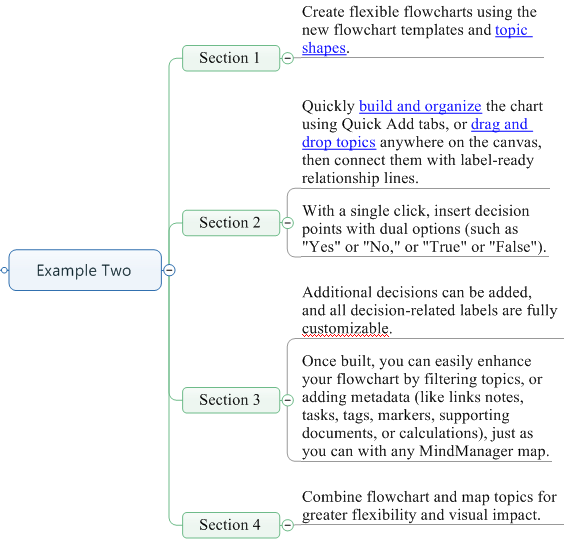
The resulting output shown above. Note the Topic Text keeps its original formatting (hyperlinks) and has been split according to the positioning of the relevant delimiter characters.
Pasted Text
You can also mark up text outside of the Map Topic, for example in MS Word, and then paste pre-formatted text into the Topic and run the Split Topic by Delimiter function. Once you know you are going to split text at certain points you can also create new text and add the delimiters as you type, knowing you can quickly create the desired Topic structures from your pasted text.
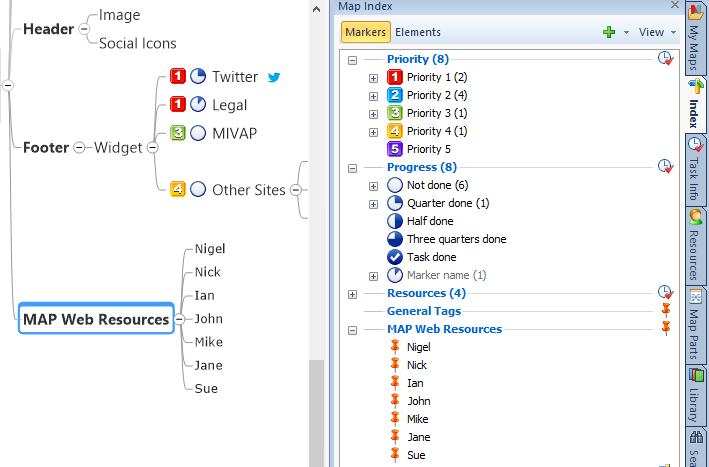
Sub-Topics to Markers
Sub-Topics to Markers is a Topic Action that enables you to convert a Topic and its Sub-Topics into a Map Marker Group and its Markers.
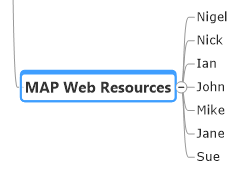
One useful application of the Sub-Topics to Markers command can be found if you use MindManager to Map meetings and you have an attendee Topic within your Map. Using Sub-Topics to Markers you can select the Topic and automatically create and populate a Map Marker Group which can then be used to assign users to Tasks etc.
If a Map Marker already exists it will be skipped. This means you cannot use duplicate names if your representing people. If your meeting Map contains two Peters then make sure you differentiate them in some way to include them in the output.
Sub-Topics to Notes
Sub-Topics to Notes is a Topic Action that converts the Sub-Topics of the selected Topic and inserts them into the Topic Notes.
The Sub-Topics to Notes command is useful for breaking down Maps that are starting to become too big to manage effectively. By carefully analyzing and selecting key Topics, the command will help you condense large maps allowing you to maintain information in the one Map rather than needing to start splitting the Map into several Maps.

Sub-Topics to Notes only takes the textual information of the Topic into the Notes. Icons, hyperlinks, Images etc are not supported at this time.
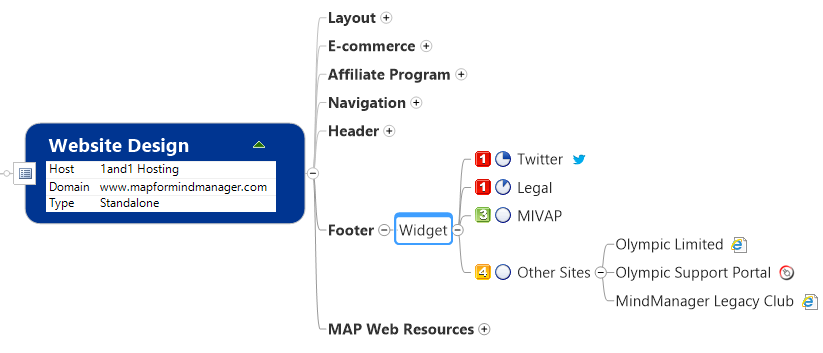
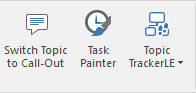
Switch Topic to Call Out
Switch Topic to Call-Out is a Topic Action that takes the selected Topic or Call-Out Topic and changes its style. So a Sub-Topic will become a Call-Out Topic of the Parent Topic or a Call-Out Topic will become a Sub-Topic of the Parent Topic.
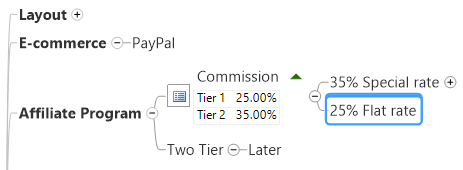
This command can be used to change the context of a Topic by changing its position in the Map from a Call-Out to a Sub-Topic. Call-Outs tend to draw a viewers attention more than a Sub-Topic and if there is a single Sub-Topic in a group of Sub-Topics which you want to give precedence to this command will help you do that in a single click. The command works on a single Topic selection and works both ways.
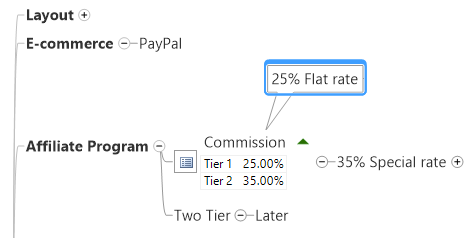
If a Sub-Topic has Sub-Topics itself then these will also be converted
Task Painter
Task Painter is a Topic Action that enables you to copy the Task attributes from one Topic to another.

This command helps you quickly duplicate Topic Task attributes onto existing Topics without having to copy the Topic in its entirety and then delete the unwanted elements. Is is useful when creating Project Plans and Timelines with MindManager and saves time in setting up Project Templates.
Task Painter will transfer all Task attributes and will also include any other Map Marker Icons that the Topic contains.
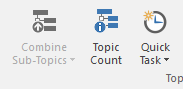
Topic Count
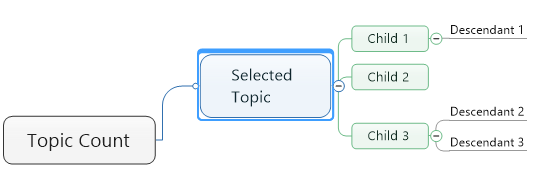
If you are one of the many people who asked us if there was a way to count the number of Sub-Topics in a branch and then utilize that value in the Map, then Topic Count is just for you.
This simple function lets you use one or more of three possible outcomes. You can choose to view the values as a simple message box.
Select the Topic you wish to count.
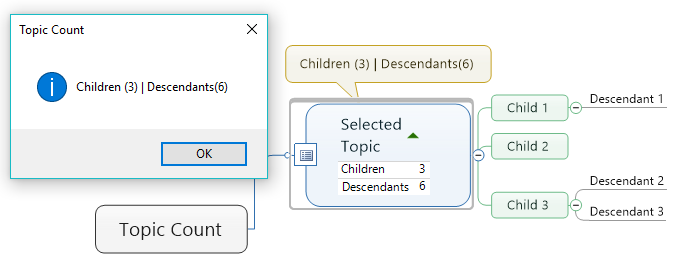
Click the command to display the Topic Count Options dialog.
You can choose to have the information added to the selected Topic as a Call-Out Topic, and finally, you can have the values added to a Custom Property on the selected Topic for use in autocalcs and/or other Formulas.

You can also select whether Descendants should include Child Topics in the result. When you execute the command your chosen options are applied to the current Topic.
Enabling the Set as default action option will mean the command will bypass this dialog and use the settings from the last execution. To change them you can access the options again by right-clicking on the command from the MAP Task Pane.
Note: If Call-out is selected then any existing Call-outs on the Topic will be removed. Call-Outs will also not be placed if the selected Topic is the Maps Central Topic.
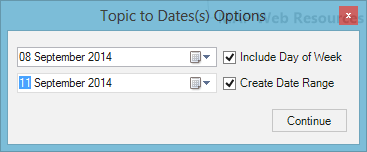
Topic to Date(s)
Topic to Date(s) is a Topic Action that enables you to insert dates onto the selected Topic or to create a set of Topics pre-populated with a date range.
Single Topic converted to date:
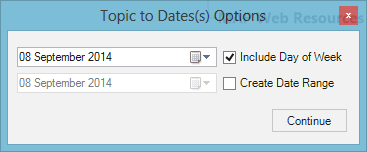
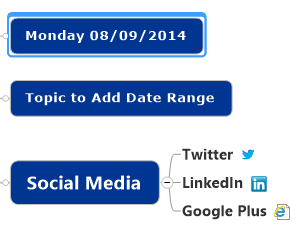
A Date Range applied to a Topic:

This command is great for creating calendared Maps. Ideal if your using MindManager for Personal Time Management
The date format should be set to your current local settings style and format.
Topic Duplicator
Topic Duplicator enables you to rapidly create multiple copies of a selected Map Topic. This new function helps you to create Map Templates, Demonstration Maps and sets of Tasks for projects in a very short time.
Duplicating Topics
Select the Topic that you wish to create multiple copies of and then click the Topic Duplicator command from the MAP Ribbon menu or Taskpane. You should then see a dialog asking to enter the number of copies you wish to create.

Use the up/down arrows to increase or decrease the number of Topics required. You can also type a number directly into the box.
Click the Duplicate button to have the Topics created and placed into your Map.
Once complete, your new Topics will appear.

Note: Topics are always created at the same level of the currently selected Topic.
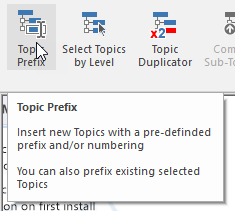
Topic Prefix
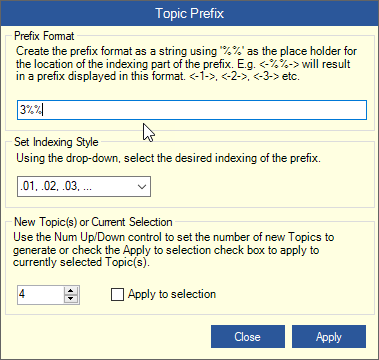
The Topic Prefix function enables you to apply a bespoke prefix to Topics within a selection or to create a set of new Topics already labelled with a bespoke prefix.
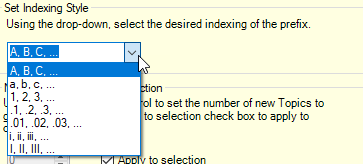
When you activate this function you are prompted to enter a format for the prefix. The character “%%” is used to mark the position of the index part of the prefix. So as an example, the following prefix format, <- %% ->, would result in a Topic Prefix result of <- A ->, <- B ->, <- C -> etc. if the Uppercase Alpha option was selected as shown in the screen below.

The resulting changes in the Map look like this:
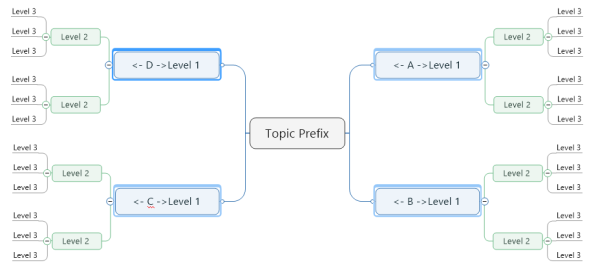
Indexing styles can be selected from the drop down list.
Creating New Topics or Applying to a Selection.
Prefixes can be applied to existing Topics by selecting those Topics you wish to add the prefix to and making sure that you check the Apply to selection option on the dialog.
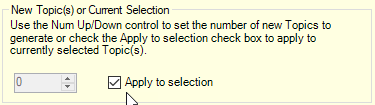
If you wish to create new Topics then uncheck the Apply to selection option and use the Number Up/Down control to specify the number of new Topics to create. The new Topics will be added to the Map as Sub-Topics of the currently selected Topic.
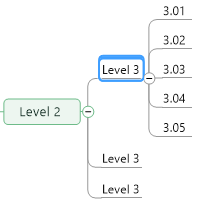
The settings shown above result in the following changes to the Map.
You can utilise the Select Topic by Level command to quickly add Topic Prefixes by Topic level as well.
Topic TrackerLE
Sometimes you want/need to track or monitor another Topic from another Map. While there are MindManager add-ins that can help you do this, Topic Tracker and Multi-Maps being two of them, they are quite complex and meant for much more specific or demanding scenarios. Topic TrackerLE is the answer that enables you to quickly track any Topic and use it in any Map. The command is accessed from the Topic Actions group on the MAP ribbon menu.
Tracking a Topic
When you have a Topic you would like to track in another Map, a dashboard perhaps, simply select the Topic in question and then click the top section of the Topic TrackerLE command. You will see the Topic Tracker dialog appear.
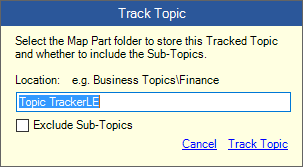
Your tracked Topics are stored as a Map Part in the MindManager Map Parts collection. On the dialog you can select/create the folder you would like to store the Map Part. Topic TrackerLE is the default folder which is created when MAP is installed.
Exclude Sub-Topics: enable this if you only wish to track the Parent Topic. If left unchecked Topic TrackerLE will track the entire branch.
Once the Topic has been tracked you will hear a confirmation sound play. You can now locate the Topic in the Map Parts Task Pane.
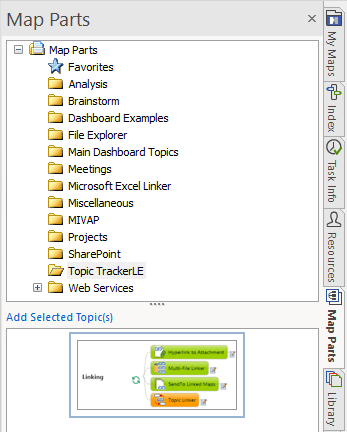
This Map Part can now be placed into any Map and be refreshed on demand to update from the source Map from where it was tracked. In the example below we have added the Map Part to the My Tracked Topic branch.
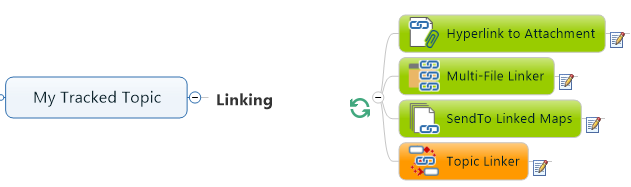
A small icon is placed on the Topic which indicates it is a Topic TrackeLE Topic and can be updated.
Updating the Tracked Topic
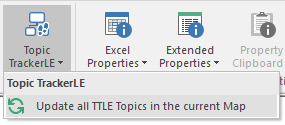
When you wish to update the Topic you can either select to update all tracked Topics within the current Map or just the selected Topic. To update all Topics in the Map select the Update all TTLE Topics in the current Map command from the Topic TrackerLE drop down commands as shown below.
You can also select this from the Controlstrip Icon menu button left-clicking it with the mouse. This will reveal the context menu giving access to additional commands
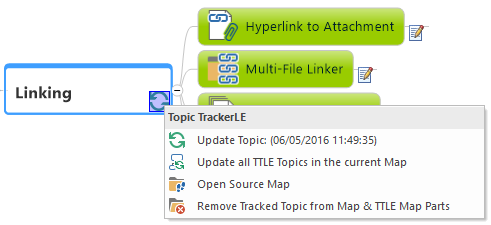
When you view this menu you can see the date/time the Topic was last updated. You can update all Topics in the current Map and also just update the selected Topic on its own.
There is also a command to open the original Map and focus on the Topic which is being tracked.
If you wish to remove the Tracked Topic from the Map Parts and the Map there is a command which can do that for you as well. If you simply wish to remove the Tracked Topic from the Map and keep the Map Part then simply select the Topic and press the “Delete” key as normal.
If a Topic ever becomes unreachable then the Controlstrip icon will change to show a warning triangle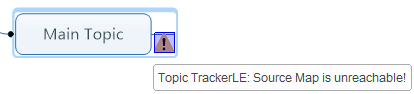
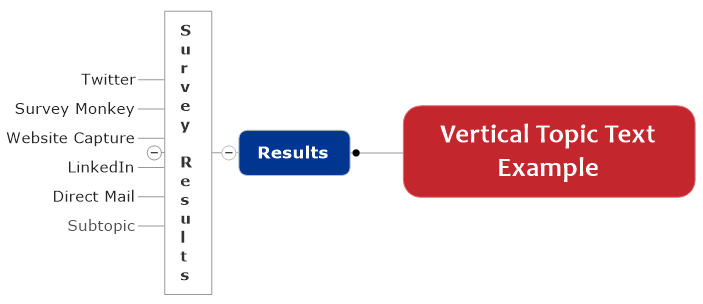
Vertical Topic Text
Vertical Topic Text is a Topic Action that enables you to quickly create Topics where the Topic Text is vertically aligned.
Vertical Topic Text can be used to good effect with the Left Map command to create Maps where multiple inputs converge to create a singular output.
Use the Format Topic option in MindManager which is access by right-clicking the Topic to access the context menu. You can then adjust the Topic margins and padding to achieve the result you require
YouTube Video Topic
Create Maps that enable learning and enhance the presentation of Mapped information with MindManager and the MAP YouTube Video Topic function.
The YouTube Video Topic function enables you to create Map Topics that contain embedded urls to YouTube Videos that can be viewed in a dedicated Taskpane within MindManager. The Taskpane is split into two windows that enable a YouTube video to be displayed/played in the top window and additional content in the form of Topic Text Notes or URL to another web page to be displayed in a second window below the video.

The YouTube Topic Taskpane can be set to display automatically whenever a Map Topic containing YouTube Topic information is selected. With this option enabled the Taskpane will slide into view if it is collapsed and start loading the video and supporting information. If this option is not set you can display the Taskpane and load the YouTube Video Topic content by left-clicking on the YouTube Video Topic control strip located on the Map Topic. This will display a context menu with several options, including one to Play the video.
Creating a YouTube Video Topic
The special Topics can be created by selecting the upper section of the YouTube Video Topic command on the MAP Ribbon Menu.
When the YouTube Video Topic dialog displays, enter the following details:
- YouTube Video ID: This is the URL to the video. Most YouTube URL formats are supported and can be simply Pasted into the Text Box on the dialog.
- Display Text Notes: Check this option if you would like to display the Topics Text Notes in the bottom window of the YouTube Video Taskpane.
- Display URL: Check this option if you wish to display the content from a web page or local HTML file.
- URL to display: This will be enabled if you select the Display URL option above. Type/Paste the URL of the web page you would like to display.
- Autoplay: Check this option if you would like the video to automatically start playing when the Autoplay feature is enabled and a Topic is selected.
NB. When there are no Topic Text Notes or an alternative URL set to display a default page from our website will be displayed.
Once you have entered the information click the Insert button to create the YouTube Video Topic information.
Editing a YouTube Video Topic
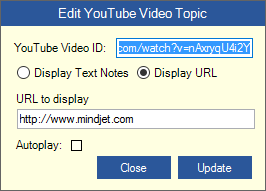 If you wish to change the settings of a YouTube Video Topic simply select the Topic and click the YouTube Video Topic command. This will display the Edit YouTube Video Topic dialog where you can update/change the settings for the selected Topic.
Once you’re finished, click the Update button to commit the changes.
YouTube Video Topic Auto-View
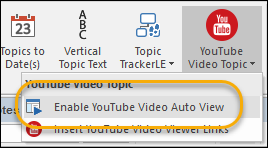 This function will automatically open the YouTube Video Taskpane (if it is not in view) and load the contents for the currently selected Topic. If Autoplay has been selected on the Topic then the video will load and start playing.
When enabled the upper section of the command will become “lit” to show this feature is active. The feature can be toggled on/off from the lower section of the YouTube Video Topic command.
YouTube Video Topic Context Menu
If you left-click the YouTube Video Topic control strip icon located on a YouTube Video Topic the menu below will be displayed.
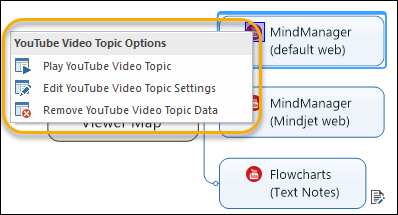
From this Context Menu you can select any of the following:
- Play YouTube Video Topic: Play the video on the selected Topic. If the YouTube Video Topic Taskpane is not visible it will be brought into view.
- Edit YouTube Video Topic Settings: Enabled the settings of the YouTube Video Topic to be updated/changed.
- Remove YouTube Video Topic Data: Clears all of the YouTube Video Topic data from the selected Topic.
Sharing Maps with YouTube Video Topics
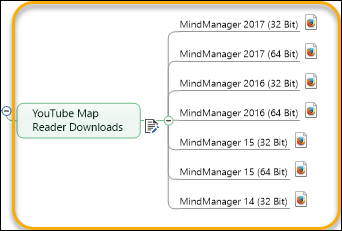
Obviously one of the main objectives of including video in your Maps is the ability for other MindManager users to be able to view them. In order to facilitate this for MindManager users who do not have MAP for MindManager we have provided a free MAP YouTube Video Topic Viewer which can be downloaded for the following versions of MindManager:
MindManager 14
MindManager 15 (32 Bit & 64 Bit)
MindManager 2016 (32 Bit & 64 Bit)
MindManager 2017 (32 Bit & 64 Bit)
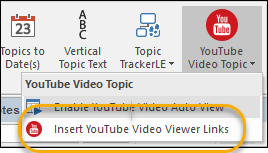
These viewers can be downloaded from Olympic’s web servers and you can insert a Topic with links to these downloads into your Maps using the Inset YouTube Video Viewer Links command located on the lower half of the YouTube Video Topic command.
The Viewer can be installed without any license requirement and is freely available to anyone wishing to view Maps containing YouTube Video Topics created with MAP for MindManager.
Once installed the YouTube Video Topic icons will be displayed and the user can turn Autoview on/off.
They can manually play the videos by simply left-clicking the YouTube Video Topic icon on the selected Map Topic.
MAP for MindManager Trial
Buy MAP
MAP for MindManager is available to purchase securely through our online store.
Visit the store to view license options.
Contact us for multi-user pricing or custom quotes.
MAP User Guide
Download and view the MAP for MindManager User Guide in Map format to learn more about each of the tools available in this feature packed add-in